|
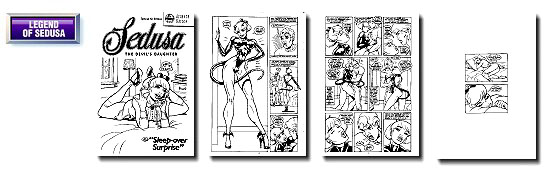
Comic Book (No longer available)Each kit includes a 24 page Sedusa comic.
To find out more read The Legend
of Sedusa or click on one of the sample pages below to
see a closeup. |
|
Comic Book (No longer available)Each kit includes a 24 page Sedusa comic.
To find out more read The Legend
of Sedusa or click on one of the sample pages below to
see a closeup. |
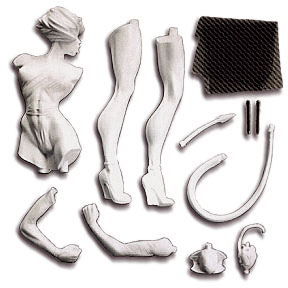 Make sure you have all nine pieces listed
here. You may lay them out as per Diagram A; (Note that though
the head is shown seperate from the torso in diagram, in the kit
they are one piece.) The 9 pieces are:
Make sure you have all nine pieces listed
here. You may lay them out as per Diagram A; (Note that though
the head is shown seperate from the torso in diagram, in the kit
they are one piece.) The 9 pieces are:
First, remove all casting sprues and shims. (Note: As the heels on the shoes are fragile, you may wish to leave these support shims in until assembly is finished.) On each piece remove only the areas indicated by the shaded portions in Diagram A. After sawing, sand surfaces to relative flatness.
Match up the Right Leg (remember, it's got the "R" on top) to the Sedusa's Right thigh. There are tiny lines scribed on the outside of the thigh and on the leg that should help you to line up the parts. (See Diagram B) But be sure to trial fit to make sure that the muscles align correctly before gluing.
Glue left leg again looking for line-up lines. You might think that model should stand on its own at this point, but it will be front heavy until arms and tail are attached.
Do not begin gluing on the arms at this point, because now is the best time to do near-finish sanding on the legs and torso.You can get at those hard- to-get-at places under the arms with ease. Sand thigh seams (Diagram C) until they are ready to paint. Touch-up surface sanding on the breasts, abdomen, back, and underarms will make the flesh look extra-smooth and supple under a glossy painted suit.)
Sand both arms completely before attaching them.
Before gluing, test for fit. (Scribed lines will assist line-up.) Note the correct position of her fist (the tail must line up to it later.) See Diagram D and F.
There is also a scribed line-up mark for the left shoulder and arm. It should place her left fist toward the back of her thigh (See Diagram E). Once both arms are attached, putty and finish sanding the shoulder seams.
Before attaching, sand the tail thoroughly. It should taper smoothly. Do not sand the two little scallops cut out of the end of the tail that allow the tail nestle into the top of her buttocks. Repeatedly test fit, so that the tail fits well, and seems to flow out smoothly from the spine.
The tail should swing around the right leg (Diagram G) with the narrow end fitting into the bottom opening of her right fist When all fits well, glue in place. Putty and finish sanding the tail/spine juncture.
The tip of her tail emerges from the top of her right fist, continuing the curve of the big tail section (Diagram H). The tail was designed so that the arrow part points to her right eye (Diagram I), but you may wish to experiment, twisting the tip around in her hand to get other effects. Just make certain you maintain a fluid continuum between where the tail enters and exits her hand. Also, it may be helpful to drill out the top of her fist 1/8 inch deep with a 3/16 inch drill bit for a more secure fit.
The heart is an "optional" item depending on how gruesome you want this kit to be. If you like a Sedusa that's "all heart", start by drilling out the top and bottom of her left fist with a 1/8 inch bit. You need only drill about an 1/8 inch deep top and bottom. Next cut about a half inch off the artery (Diagram J) and glue the little piece so that it comes out of the top of her fist. The rest can dangle back behind her knee (Diagram M for position).
Take your time cutting free the two tiny batwings (staying close to where they meet the ball). Don't forget to remove the thin little disc in the center (Diagram A). The tiny nub in the center that gets glued to the back of the strap should be filed at an angle so that when glued to the back of the ankle strap, the tips of the wings tilt out and away. (Diagram M, left foot shows angle). Also make sure that the wings follow line of leg (Diagrams K and L).
After model is completely assembled, a very strong stilletto heel that will never break can easily be made. First, snap off about half of the existing heel. Carefully drill 5/8 inch deep holes using a 3/32" bit into the bottom of each heel, making certain to get the same angle as the broken-off heel. Clip off the pointy tips of two 4D finishing nails so they are a 1 1/8" long. Push nails into drilled holes. Now with sliding nails for heels, place Sedusa on a smooth (formica) level surface. Letting the nails slide freely, adjust her to the point were she will be balanced, and using a rapidograph or other sharp marking device, mark the point where the nail disappears into the resin. Now you can take out the nails, put on super-glue and push them in to your marked points. Notice that the tiny nail heads replicate perfect heel soles. Putty and retaper bulk of heel to flow naturally.
To get the feet to be perfectly flat is easy. First, wipe a light coal of Vaseline about a foot square on a smooth (formica) level surface. Then smear just a dab of putty on the bouom surface of the shoes and press model into her final free-standing position on the vaseline. Putty should squeeze out of all sides of each shoe. With sharp knife trim off the excess putty squeezing out. Let putty harden and slide her off table. Shoes will not stick because of Vaseline. Finish, sand and paint soles of feet.
Sometimes airbrushed paints give a toothy surface build up especially on light flesh when several coats are needed to cover dark primer. Try dabbing on the final flesh coat a section at a time with a Q-tip and rubbing it in with your finger. This will knock down the grainy peaks and fill the depressions at the same time. It will render a surface that is almost glassy smooth. Final detail airbrushing will go on great, and a finish or protector coat of a lacquer dull coat gives the proper sheen.
Very tiny and inexpensive bracelet, anklet, and necklace chains come in a wide variety of designs, some with linkage that looks remarkably like teeny silver zipper teeth. You can sometimes find costume jewelry in notions stores, or hanging on cards in the cheap areas of clothing stores.
As expert painters of models will tell you, contrasting surfaces can add a lot of realism to your model. Sedusa provides an excellent opportunity to exploit surface contrast. Her skin should be dull-coated to a satin finish, but her costume, the heart she holds, her eyes, and lips can be made as glassy as possible. Tedious liquid or frisket masking and then spraying several coats of gloss lacquer render excellent results, but removing maskoid or frisket with multiple coats of lacquer can be hazardous, with peeling and tearing of edges. A safer way is to simply brush on a good water-base varnish like the excellent Liquitex Gloss Medium and Varnish (artist paint store).
With a good quality, soft bristle brush apply liberally in slow, even strokes to avoid tiny air bubbles. As with all fast-drying varnishes, put it on, and leave it alone. Don't keep going over it. It begins drying immediately and going over it to smooth it out will only cause the streaks you wish to avoid. The varnish will contract as it dries and be pretty much self-leveling.
Several coats like this, applied about an hour or two apart will give you a super-protective glass-like surface. Overnight it will be dry to the touch and you can handle it freely, but don't lay it against anything for a prolonged period; it will stick. It takes several days to cure to its final hardness.
After her back flesh is painted, a penny's worth of black netting added to the back of Sedusa's costume adds a nice detail. You will find mesh netting at any sewing or notions store. First, to make the netting pliable, you may need to wash the starch out of it. Warm tap water, blow dry. Then roughly cut to size leaving 1/4" extra all around. Test fit. At this point, if the netting does not seem dark enough, you may wish to fake it, by painting her back slightly darker colored flesh than the rest of her skin. Then stretch the netting over her back using tape, eliminating any wrinkles and making sure the tape does not overlap the glue edge.
Now, apply a tiny line of super-glue to the very edge where the net meets the costume. Using a hypodermic makes this a breeze, but you can increase control by applying glue with a small wire. Next, staying just outside of glue line, use an X-acto knife or other sharp blade to cut off excess netting.
Painting on several heavy coats of gloss gel varnish on the overlap area will build up and smooth out the glue edge. Then a final painting will hide all visible means of attachment.
Again, you can find cheap costume jewelry that has tiny little glass beads and diamonds that can be removed and re-glued any way you like to adorn Sedusa. Also, you may have a notions store that has accessories for dolls. These places are treasure troves of miniture do-dads.
Also, if you want to accentuate the edges of Sedusa's costume, check out craft stores for little flexible plastic cord that is sometimes used for brading. It makes nice seam edges.
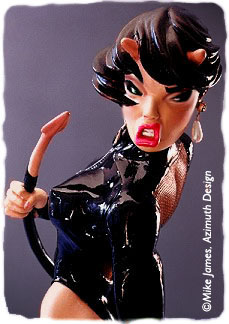
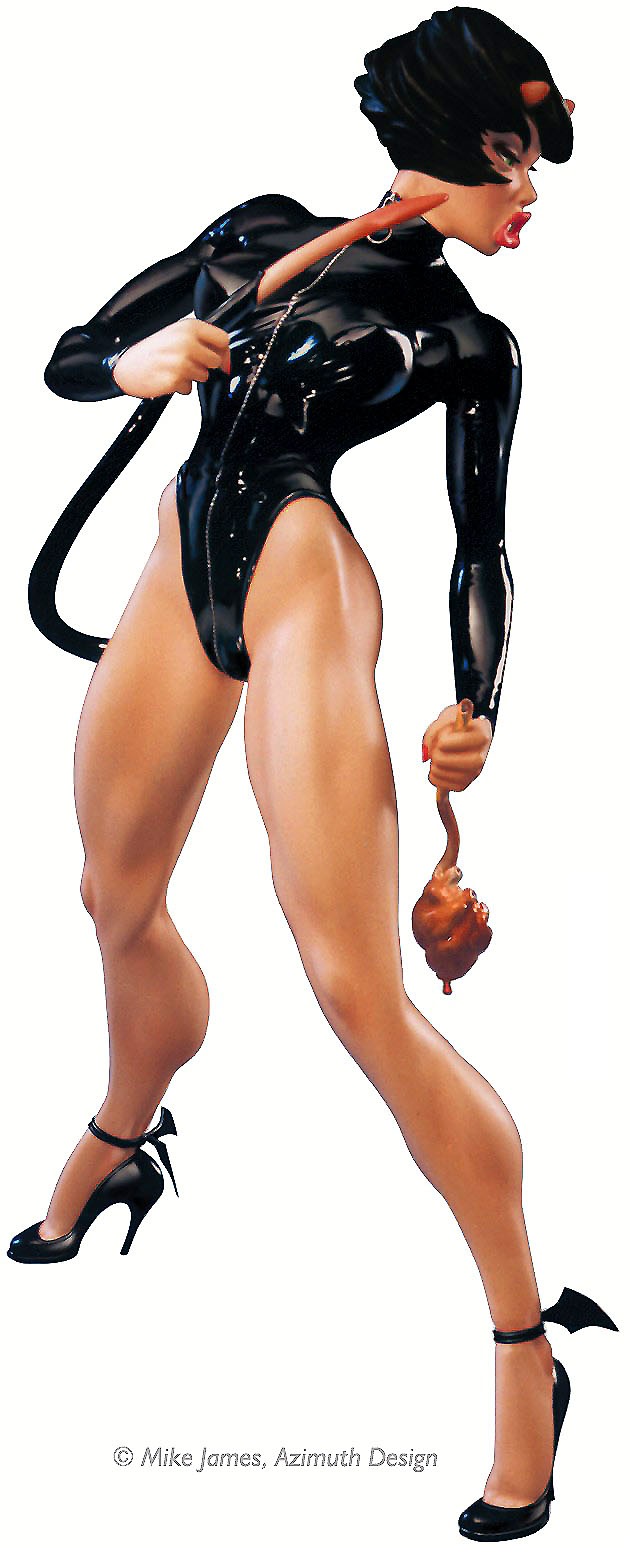
Note to collectors: Sedusa was Mike's very first kit sculpture. We believe that she, and her sister Angelissa, were two very important characters for him. They show evil, with a little good (Sedusa), and good, with a little evil (Angelissa). This dual Yin/Yang theme, innocence and wickedness, is evident in ALL his girl art. These two kits set the tone of nearly a decade of work. To all of you who have the Sedusa kit, hold onto her. She was the very first of long line of very special girl art, and is doubtless going to be a valued collectible.
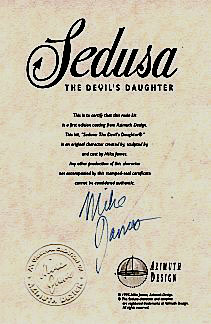
We have had a lot of illegal knock-offs of our
kits sold in foreign countries.
Remember, Azimuth Design only sells directly to
the customer, not in stores. If your kit does not include
the Certificate of Authenticity below, with the
Raised Seal and personally-inked signature
of Mike James,
you do not own a Mike James original piece of art.
It takes a lot of time, skill and money to bring you these precious
girls. Please support creators, not thieves.
Contact us if you suspect illegal activity, or if you see a Mike
James kit or image being used for profit.
Copyright © 1995 Mike James, Azimuth Design
The Sedusa character, in part or in whole, likenesses thereof, storyline and all related materials are copyrighted
and registered intellectual property of Azimuth Design. All rights reserved, in any media.

